The Corecell Bimini
Designing the Dodger and Bimini
Our old dodger is in really bad shape and needs to be replaced before we go south again. A friend of ours spent over $10,000 on a full enclosure for their boat last year. We can’t afford that but we have a lot of left over Corecell from our dinghy and we are supposed to be able to thermoform it. I thought we might get away with making a hard dodger and bimini out of corecell. It would also give me something constructive to do with the leftover corecell.
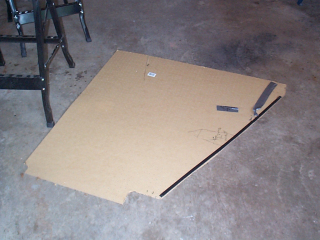
The first problem was getting the shape of the dodger and bimini. We had an old dodger frame that we could use to get the basic shape we wanted. Using 1/8th inch peg board was an interesting way of getting the shape. It would bend easy, there were lots of holes we could use to cable tie it to the frame and tie pieces of peg board together to get the shapes.
We could not get a decent shape out of the peg board for the bimini so we left the boat that day with a good shape for the dodger and a panel that sort of gave us the shape of half a bimini but not really something we could use.
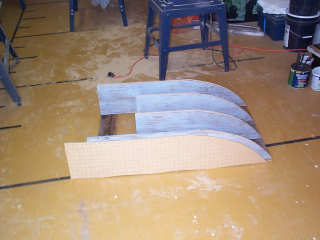
Since the bimini should “kind of” match the dodger I got the idea that we could actually take the curve off the dodger and then use that shape to build the bimini once we had the shape we could fit it to the boat
Getting the Bimini shape
Once we have the curve we can make a form
Attempt at thermoforming in the oven
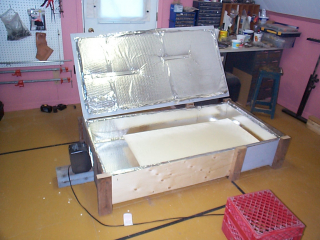
Molly Schrum put me on to one of her co-workers Chris Duer. He sent me the basic idea on how to build an oven for the thermoforming of a sheet of corecell. The sheets I use are approx 23 in by 48 inches so the oven was fairly big.
My oven shown with a sheet of corecell in it’s “cooking” position seemed to be able to raise the temp well above the temp needed (150F) for A500. A laser temperature gun read about 170f on one of my tests.
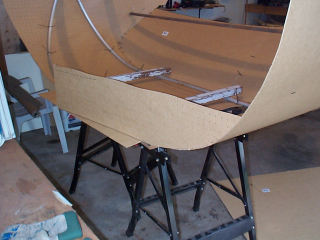
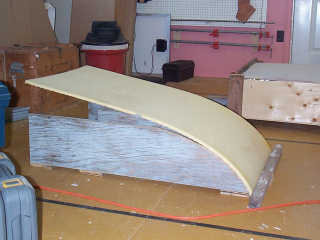
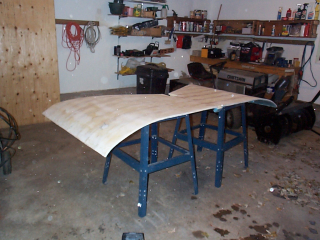
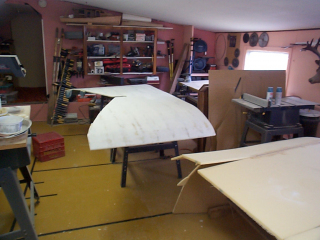
I made a form of the shape I needed on the floor and since I need four sheets all the same for the bimini I just made it the size of one sheet. A pic of the form is shown above, I later added a 2×2 screwed across the front so that we didn’t have to hold it. We could just stick the hot sheet into the form at the front, lay it down on the form and weight it down so it would be held into shape as long as it needed without needing my wife and I to babysit.
We preheated the oven and then tried heating a sheet for 15 minutes we put it in the form and got very little bend that stayed in the sheet. When removed from the form it sprung back immediately. We then tried different attempts with 20, 30, and even 40 minutes with little difference in effect.
The last attempt was about 40 minutes before being placed into the form and then after it was in the form I tried using a heat gun to help it take shape but even then the corecell sprung back although much less than with just the cooking.
Thermoforming strips
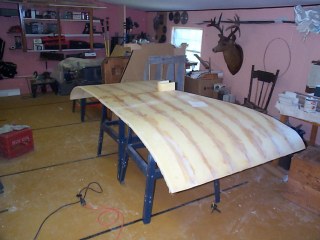
I sent a couple notes but never got a response from Chris but while I was waiting I tried bending a 6 inch wide strip over the form and had pretty reasonable success. Rather than worry about getting the oven working to cook large sheets I just split the sheets into four 6 inch pieces and used a heat gun to bend the sheets. It doesn’t look as good as it would with just one joint rather than seven cuts per side but it meant I was able to get the bimini fitting done before I would have to take the mast off for winter storage. If I could get the fitting done I could spend more time on finishing this winter.
I used a cheap plastic over the form and used a filleting blend to join the pieces together. Once I had the two halves built I flipped them upside down on my shop floor, weighted them down and bonded them together. Getting it upright I put the peg board bimini form and cut what I hoped would be the right shape. I then put a single ply of glass over it so I could get it to the lake (30+ miles) with a hope of survival. I also attached one of the mast shapes I had made when making the forms.
The idea is that the collar will attach to the mast and the shrouds and backstay will support the bimini at the outer edges. To get the supports for the shrouds I wanted to get the shapes and angles I needed for the supports.
Shaping the supports
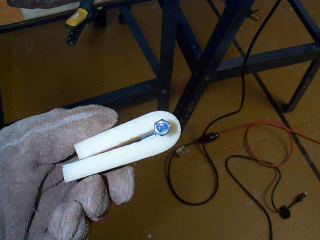
What I wanted to do was have a clamp that I could slide the shroud through, tune the rig and then tighten the clamp on the shroud and it would hold the bimini in place and not deflect or put took much load on the rig.
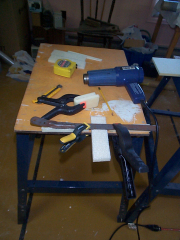
I put a couple pieces of corecell on either side of the piece to be bent and clamped a steel bar across the top and used the heat gun to bend the corecell over the bar
A special support
The backstay for the main is a heavy 1/4 inch stay and the corecell has to be shaped for the task. Adding a bolt to the mold only partially helped the task and didn’t give the right shape.
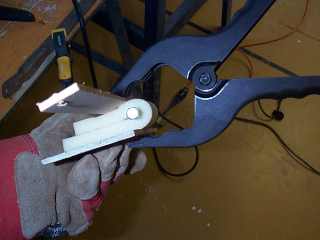
Adding a couple extra pads and a clamp over the top allowed me to heat the corecell until it took the shape we wanted.
We took the bimini to the boat and took two lines form the top of the mizzen forward to the cleats and removed the two forward shrouds. This allowed us to slide the bimini into position. Except that the collar wasn’t placed properly. We sliced off the collar and used a large C clamp to put it on the mast in the right position and then rested the bimini on it. We were tucked in behind the wharf in Douglas Harbour and it was calm but we had to work carefully and quickly as we could see the wind line across the water not far away. Any wind and this job could have gotten a lot worse in a hurry.
We fitted the bimini so it sat on the collar and rested on the backstay for the main backing the bimini up until it contacted the inner shroud. It didn’t make it which confused us. We lowered the collar an inch and the bimini touched the inner but not the outer, so we had to cut a small notch in the bimini and put our bimini supports onto the shrouds and clamped them on the shrouds. It took careful fitting an marking on the shroud supports and bimini but I think we had good supports designed and fitted.
The next challenge was how to figure out where the forward stays passed through the bimini. We removed the bimini and reconnected the shrouds. Since the bimini would be almost level we ran a level from the outer shroud to the forward shroud where the support was and put a piece of tape. And then we measured the distance from the outer and inner shrouds and from a mark in the collar to the tape on the forward shroud. We then made arcs on the bimini where the corresponding marks touched on the bimini. Of course the lines through the air ran straight and though the corecell, not so much, but we ended up with a triangle that was reasonably small so we drilled a two inch hole centered at the center of the triangle and hoped.
After disconnecting the shrouds again we put up the bimini put the shrouds through the bimini and hooked them back up. The holes would be fine. We fitted the shroud supports and had a reasonable looking setup. We were also moving around a lot under the bimini while doing this and it didn’t make life too difficult which made me feel better about it’s height.
We put the bimini on the dock, put the shrouds back on properly, disconnected our halyards from the cleats and put the boat back on our mooring which was on the other side of the wind line. We got it all done without any wind, unfortunately without pictures as well.
Prepping the bottom side
We had reasonable success with using plastic to help provide a finish on the epoxy. We used light weight shower curtain material and that was ok for small size but didn’t work for large areas. A friend used a heavy weight plastic with success so I tried it using 6 mil construction vapour barrier.
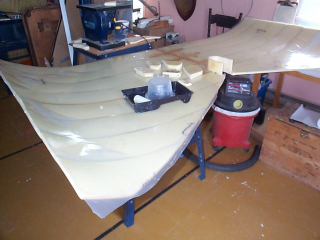
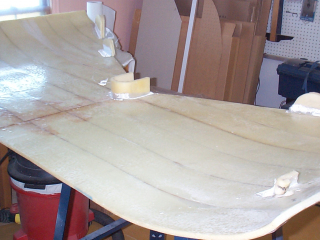
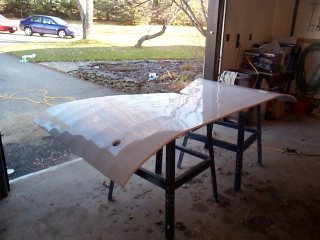
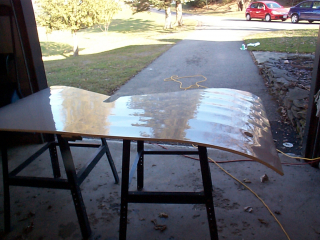
This picture was taken after the epoxy had hardened. The extra pieces of corecell on top are the shroud supports. The high gloss foam roller did a good job at spreading out the epoxy and a dry roller did a good job of smoothing the plastic and getting the air out from under it.
Where we did a good job getting the air out we had a really good finish where we didn’t it wasn’t as good. And as you can see in the picture there are some places where the plastic just won’t flatten down on the surface. My joints just weren’t good enough.
We also decided we liked the collar under the bimini not on the top of the bimini.
The 6 mil plastic peeled off very easy and had a pretty good finish. I cut new supports for the aft edge by the time they were fitted they were pretty small so I made bigger ones and cut them to get the shape I wanted and then fitted them to the bimini. I tacked them in place with a screw from the other side so they would stay in the right position until the epoxy cured. After the epoxy cured I added glass for addition support
After finishing the shroud supports I sanded and painted the underside of the bimini. Since it was on the bottom and hopefully taking a lot less wear than the top. I decided to use the the same Krylon paint I used on the dinghy for it. The Krylon gives a high gloss and looks sharp. I used two coats applied with a high gloss roller and then sanded it before applying Krylon Bahama Sea blue in a spray form.
Almost all of the beautiful plantation homes in the south had blue ceilings and when we asked why someone said it was because mosquitoes won’t stay where there is a blue sky overhead. I have no idea if it’s true but we know we didn’t want a white ceiling, way too much glare, so the bluest color we could get in Krylon was Bahama Sea blue. It’s close to the murky blue you get in the Sea of Abaco.
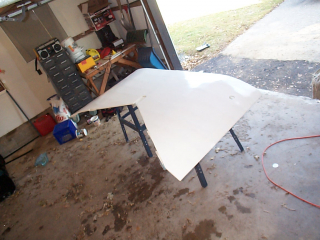
Once we were got that done it was time to do the top. We sanded it down until we got it ready for a primer and took it to the garage. I wanted to use the same paint as on the hull and with Interlux Perfection they say we should use the Epoxy Primekote as a primer. The fumes off the stuff are INTENSE. We set it up in the garage and primed it.
After the primer was almost dry (We thought it was) the temperature was falling and if we wanted it to cure we had to move it to the shop where the heaters could bring the temperature up.
The epoxy primekote is a white thick coating that seemed to go on very well. I’m please with it so far.
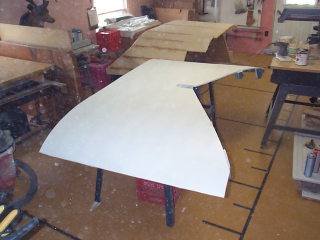
After sanding it down to 150 grit there is absolutely no doubt that the joints between the strips are going to show. How glaring they are going to be is hard to say. But we’ll see. I’ll definitely have to be a little more careful with the dodger.
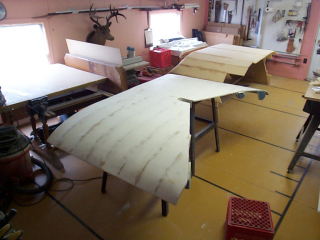
You can see the dodger beside the bimini in the pictures above. The two of them fill the shop. Once the bimini is done I can take it and store it in the barn and it will be out of the way. Until then it will have to co-exist with other projects that are ongoing.
The next three days are supposed to be above 10 C, the minimum for painting so I have to get the second primekote and I hope to get the first and maybe the second coat of Perfection on the top.
Done the bimini.
I did get the bimini done during our stretch of nice weather.
We did a single coat of Perfection with a high gloss roller and let it dry before giving it a light sanding with 220 grit.
The joints are going to be glaringly obvious but having them every six inches is better than having one up the middle that is super ugly. It will also channel the rain away. So I think it will be fine. I just have to be much more careful when I do the sanding on the dodger.
Updated on 01/12/2010 06:20 AM The full photo album of building the bimini
